The key factor to selling apparels item is its picture. Day by day, the business competition is increasing rapidly, and you can’t win the competition without upgrading your selling strategy. Nowadays, having only a physical store is outdated. People like to do online shopping, and that vastly depends on an attractive product photo.
That is why you learn how to take pictures of clothes to attract buyers. It is the secret to increasing your sale and making double revenue. But Startup Company has budget limitations to arrange professional product photography and hire a famous model. The cost-effective and fruitful solution is to take pictures in a unique way to hold the customer’s eye.
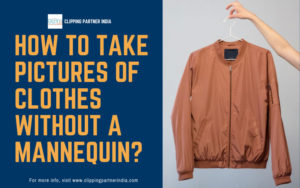
Yet previously, businesses owner used ghost mannequins as an alternative to model photoshoots, but it has become common and boring. So here we will reveal a step-by-step guide on how to take pictures of clothes without a mannequin. It will help you to boost sales and derive the best quality product images at an affordable cost. I know you are wondering how it is possible. Give me some time to explain the detailed photography process that can change the game. So Let’s drive into the article.
Table of Contents
How to take pictures of clothes without a mannequin?

If you look at previous sales statistics, you will shock to know that 80% of customers give priority to product pictures for buying online. A product that displays on mannequin gains sales less than high-quality, appealing clothing photography.
So to increase your sales percentage, you need to proceed strategically. Here is the step-by-step guide on how to display clothes without a mannequin.
Try the conventional flat lay process.

To say goodbye to expensive model photoshoots or mannequin photography conventional flat lay process can be a fantastic choice. It is a simple process to display clothing items conveniently. You need to place the garments products and keep the camera parallel to shoot the product.
As you just keep the product on the ground, you don’t need to invest extra money to buy anything like mannequins. As you keep the clothing items in a flat laying position, it is known as flat lay photography techniques. You will be glad to know that this cost-effective photography idea can show lots of product detailing to grab online shoppers’ attention. Now let us explain the detailed process of how to take good pictures of clothes without models or mannequins.
Step 1: Planning and Preparation

The first step in how photographing clothing without a model is doing proper planning and preparing your apparel items accordingly. Preparation is the key to making your garments appealing. For example, you are using fashionable clothing for photography that won’t have iron. That picture won’t come out good.
So you need to take care of the cloth to make them impressive. You must do the iron and make sure there are no wrinkles on the cloth. If you want to hide the product tag or labeling, then use tape to hide it. To highlight the exact shape in a static image is really challenging. You can use pins and clips to display the right shape of t-shirts, shirts, etc.
Then do the proper photography planning. You need to fix a place where sunlight is adequate. Lighting is important to represent the exact product color. After choosing the photoshoots place, you can add a flower or antique camera, sunglass, or Aladdin’s lamp near the clothing to enhance the attractions.
It helps to hold the customer’s eyes to product images at first glance. As you are done with proper planning and preparation, you can jump to the next step.
Step 2: Arrange photography equipment

You need some basic photography tools to take pictures of clothes to sell. Only a camera is not enough for clothing photography.
You need to arrange the below equipment
- Tripod
- Light
- Backdrop
- Boxes
- Other objects for decoration
All these items are necessary to learn how to photograph clothes for sale.
Step 3: Inspect the Garments item.

Before you jump on how to take pictures of clothes to sell, you need to check the clothing crucially. To sustain in the competitive business field, quality is important. You need to focus on product quality. So that customers can feel the premium vibe of your clothing.
If you use defective apparel item that contains holes or spots can create a bad impression about product quality. So check it carefully to find any tiny spots, stains, or holes. You should use the perfect piece of product for doing photography.
You can keep the sleeves folded to make the product more attractive, and it also helps to understand the right shape. Simply keep the clothing item that you prepared, inspect previously on the ground and maintain a shape that looks appealing. To bring the expected shape, you can use transparent tape.
Step 4: Organize a photo studio

Now you are done with arranging product pictures. It’s time to prepare the photoshoots studio. First, focus on the background. If you want to use the floor, choose the particular surfaces and clean them properly.
You can also use a table and place the table in the right corner according to planning. After choosing a place, now fixes the light sources near the camera frame. Do some trial photoshoots to check whether the frame gets proper lighting or not. You can adjust the light source place to highlight product details.
Step 5: Checking

You can also use a table and place the table in the right corner according to planning. After choosing a place, now fixes the light sources near the camera frame. Do some trial photoshoots to check whether the frame gets proper lighting or not. You can adjust the light source place to highlight product details.
Now you are almost ready. But before starting the final shoot, check your camera settings. You need to balance the aperture, shutter speed, and ISO sensitivity to capture high-quality images without a model or mannequin.
You can also go for auto mode if you don’t have proper photography knowledge. But it won’t derive actual product color, so that requires a photo editing service. It is better to avoid auto mode and highlight the actual color. As the shopper wants to detail, you should go for focused shots to capture tiny detailing of clothing.
Try high aperture shots such as F/11 and keep the shutter speed nearly 1/125 to take better product pictures. Some newbies get confused in the ISO setting. But according to the light density, you need to adjust the ISO. You don’t need to keep it fixed. But the range will be 400-800 for doing clothing photography.
Step 6: Take Pictures

Now we arrive at the last step of how to take pictures of clothes to sell. As you organize the photoshoot studio and product, simply keep the camera on the tripod and focus on the product. Adjust the camera according to the light source to highlight the real color.
Now start capturing and changing angles to bring the appealing shots. You can move near the window to take pictures in natural light to check the difference. Change the decoration to bring focus on the clothing items. You can also try hangers to make the pictures more attractive.
Post Production of product images

Mannequins for clothing Photography are becoming unpopular due to cost and boringness. That is why we share this guide on how to take pictures of clothes to sell. But after completing the photoshoots, there is a chance of having some tiny imperfections. For example, the color may look slightly dull or face unwanted objects, spots, and many more. Human hands are natural to make some mistakes. But rearranging the shoots is time-consuming and costly.
Clipping Partner India is an Image Post Production Service Provider Company.
It is better to take professional photo editing services to edit the product image. You need to re-correct all the imperfections in a natural way to bring the exact look of the product. You can’t polish the images too much and make them artificial or edited. So take help from an expert editor who knows how to make a product image optimized. This simple editing can convert more visitors into customers.
How to photograph clothes on a hanger
Using a hanger for doing clothing photography is also a popular choice. You can replace an expensive mannequin by using a hanger. It is a simple process.

Step 1: Put the cloth on a hanger
Simply use a pin or rope to hang the hanger. Then put the clothes on the hanger. Use tape to fix the shape. Then take the pictures, that are all.
Step 2: Post-production
After taking pictures, do some editing from a photo editing company to balance lighting, color, or other issues.
Final verdict
Hopefully, now you know how to take pictures without a mannequin. So apply the tricks on your next photoshoot and see the miracle. Don’t forget to take help from a photo editing company to get a better response from shoppers.
Which one is best mannequin vs without mannequin photography, is an old debate. Both photography processes have some pros and cons. But nowadays, without a mannequin is a popular choice. If you can do it correctly, then it has s a high chance of growing your sales on a low budget. For newbie startup owners, we suggest without mannequin photography.