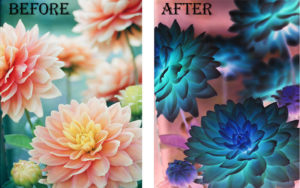
One of the most common problems with sharing photos on different social platforms is pixelation. It makes the image blurry and ruins the beauty and approach of the picture in a second. That’s why many of you often ask about how to get rid of pixels in photoshop. To answer this question, we are here now.
Generally, we need to resize an image of lower quality; pixelation occurs and destroys the effect and resolution of the picture. You can use Photoshop to fix your pixelated photos in two easy ways. First, let’s get straight and learn about the pixelated image clipping path service.
Table of Contents
How to Get Rid of Pixel Images in Photoshop?
Photoshop provides you with two different ways to fix your pixelated images. Both the processes are easy to follow, and you can handle them yourself. We also added photos of how you follow the process with each step. It will simply help you understand the whole process efficiently.
However, you can either fix the pixelated image using the sharpness tool of Photoshop or with the Gaussian Blur Effect. Let’s learn about both of them with the most perceivable steps.
Fixing Pixelated Image with Sharpness Tool
Most probably, the sharpness tool is the most used system to reduce pixels in the blur images. People mostly use it as it doesn’t require your skill and experience a lot. A simple tutorial can help you to handle it by yourself.
Step 1: Open Photoshop

First, you have to open Photoshop to use it. Next, you must have the image on your PC that you want to fix. Then, insert the image in Photoshop so that you can edit it.
Step 2: Change the image size

Now, you have to change the image size. You can press Ctrl+Alt+I for that. Or, click on the Image option on the upper-side bar and then click on Image size. You need to resize the image because almost all the pixelated images are with lower resolution. So, you have to make sure to increase the image size before you start editing it.
Step 3: After you increase the image size
Just after you increase the image size, a new smaller window will pop up on the screen. This window lets you customize the size of the image properly. Use it and change the size of the image following the requirements.
Step 4: Make a duplicate layer on the image
 At this point, you have to make a duplicate layer on the image. The same Layer will work as a backup in case you make something wrong while editing it. You can do that by pressing Ctrl+J. You can also press on Layer and then click on the duplicate Layer.
Step 5: Select the Duplicate Layer and then click on Filter

Next, you have to select the Duplicate Layer and then click on Filter. From all the options, you have to click on Blur and then Surface Blur. Again another window will pop up. This time, you have to use this window to adjust the blurriness of the image. You can do it by changing the Radius value and the Threshold.
Also, you have to press on Filter again. Next, press on Sharpen and select Smart Sharpen. It will help you sharpen the image initially.
Step 6 Image size and blurriness

Now, you have to increase the image size and check if it still contains blurriness. If you get it again, you have to reduce the blurriness by simply adding a new mask. On the new layer mask, you have to use a brush tool to reduce the blurriness.
Step 7: Fix the color balance
You are near the end of the process. And now, you have to fix the color balance of the image to make it look realistic. If the color balance is already okay for you, skip this part.
But if you want to customize it a little, you have to click on the Adjustment Layer and then press on the color balance option. Again, another window will pop up. Now, on the plate, customize the color to find the appropriate appearance of the image.

Step 8 Save the image
 Finally, you have to save the image. Just click on the file option and then press on Save As. Add a name for the idea, and it will ultimately save without any blurriness.
Fixing Pixelated Image with Gaussian Blur Effect
This process is similar to the previous one in the beginning. So, you have to insert the image in Photoshop and then customize the size. Then, increase the size a little bit as the photo requires. And then make a duplicate layer to have a backup of your image. And from here, you have to follow the below instructions.
 After you finish having the duplicate Layer, you have to click on the Filter option. Then press on Blur and then click on the Gaussian Blur. Now customize it as you prefer.
Now, again click on Filter and then press Noise. Then, again, click on Despeckle. You will get a color plate now. Just adjust it to get the appropriate color tone for the image.
 You have to check the color balance and then save the image as you have learned from the previous method.
So, this is how easy it is to get rid of pixelated images using photoshop. Both of these processes are secure, and so you can follow any of them.
Conclusion
Before taking our leave for today, we would like to remind you of a fact once again. Don’t forget to make a duplicate layer while following whatever methods you want.
That’s all. Hopefully, you now have no questions about how to get rid of pixels in photoshop. For further inquiry, contact us in the comment. Thank you.