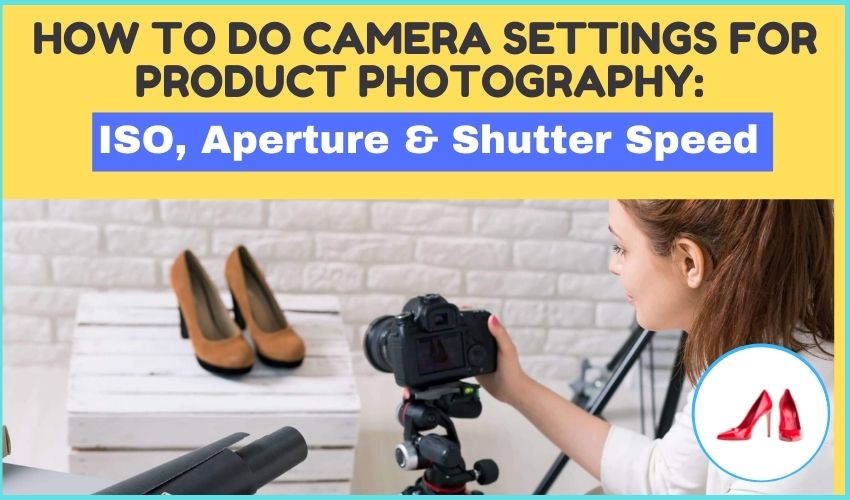
Eagerly waiting to be familiar with the camera settings for product photography? Well! It’s something related to many technical terms like ISO, aperture, and shutter speed. So, that will be our discussion area today in this article. Are you ready to grab it? Hopefully, yes. Let’s have a look at what’s inside the story!
As you already know, product photography is directly connected with business growth. You need to be extra careful while customizing the camera setting for that. It’s because camera settings are crucial, especially for product photography. That’s why we will try to clarify the stage for both professional & amateur photographers.
Why Is Product Photography Completely Different from Other Photography Types?
In most cases, Photographers are hired to click and edit product photos for the business project. So, the commercial images must be engaging enough to grip the customer’s consideration. It’s not about looking at the model beautifully or clicking a natural shot. Instead, the aim should be to click the product perfectly.
Clicking lifestyle & landscape photos are pretty similar. On the other hand, product photography is entirely a different issue. The product must have a focus and everything with it. Like a model or mannequin, it must have a vibrant look to divert the consumer’s mind precisely to the product itself.
Besides, a product photo determines how the customers will react to it and its selling rate quite a lot. So, the image must be flawless. Also, the product should have a complete focus. All its details must have a proper focus so that the customer can be sure of all its facts. Additionally, the product photo must go through a lot of customizations.
You need to check a lot of functions on your camera to ensure the product photo. In this case, you can join a photography course. No doubt it will be pretty expensive. Don’t worry! We can give a few tips both for beginners & professionals.
Table of Contents
Best Camera Settings for Product Photography

A digital camera is not a silly thing with a few functions. Eventually, it comes with hundreds of perspectives. However, you don’t need to use them all for any photography. Remember that product photography is the most professional one. It has a notable impact on business growth indeed!
So, while joining this kind of project, you need to gather enough knowledge about the camera settings for product photography. You have already learned that product photography is quite different from lifestyle and other photography types. No doubt, the camera settings must be different in this case as well.
However, we aimed to cover all the basic settings of cameras that are essential to check before we start capturing commercial products. We divided it into two major types. Basic camera settings & advanced camera settings are those two. Let’s check out the settings of both types to learn when you need to use them.
Basic Camera Settings for Product Photography
We divided the settings into two types because all product Photographers don’t need to use them both. However, basic camera settings for product Photography are mandatory. Beginners can skip the advanced stage for this. Let’s have a look at the description below about the primary settings.
ISO Setting

The sensitivity of your camera light is an essential fact to check. It’s especially crucial when you are about to click a perfect commercial product photo. This fact is widely known as the ISO setting. The ISO is measured in number. The lower number means the sensitivity is lesser. That’s why you need more time to capture the image.
The higher number of ISO can increase the sensitivity and lead to quick clicking. But believe me, it will cause a noisy and grainy image. Photographers always have to be patient. You have to spend more time letting the camera set its functions. For that, keeping ISO lower is essential. It will ensure a less noisy image with appropriate texture.
But we don’t suggest keeping the ISO setting lower always. You have to increase it gradually while capturing the image and setting the function to get the appropriate look. For example, you can first select it as 200. Then gradually increase it to 400 and then to 600. You must obtain the proper form of the image at any point among these. Then click it for the best outcome.
Shutter Speed

Many of you may think that the fact of the shutter speed can determine the photography quality. Sorry to say that it matters. The shutter speed indicates how long your camera shutter will remain open. So, it is a measured infraction. It can be lower as 1/8000 seconds and be more than 30 seconds.
However, shutter speed matters while you are capturing an image. It impacts the brightness level. Still, if the ISO and the aperture are alright, a photo with high shutter speed can be dark and doom. It also matters when you will capture an image of a moving object. The slower shutter speed can be frozen in that case as well. So, it’s better to adjust the shutter speed by observing the situation.
Aperture

The aperture is a particular hole in the lens of your camera that controls how much light falls on the image sensor while capturing an image. It functions like the pupils of the eye for the camera. So, mostly, the aperture level is suggested to keep as high as possible.
F-stop parameter is used to measure the aperture of a camera. Generally, it can be at its highest rate as f/1.8 with the big hole and the lowest as f/29 with the small hole. Thus, for an image of a light product, a lower f-stop is recommended. On the other hand, the highest f-stop is suitable for the darker product.
However, the aperture fact is essential to the light sensor of the image. Additionally, it influences the brightness level as well. Eventually, the depth of field is another crucial and advanced level camera setting that depends on the aperture.
Autofocusing Function

The autofocus option is not essential, especially when you are capturing lots of photos at a time. However, when it is a product photography project, the autofocus option is enough to ruin everything. You can keep it off and adjust the focus only when you need it.
Many cameras set focus automatically falsely if the autofocus option is on. Additionally, this option leads to the non-optimal function as well. So, you should select the focus option manually. Make sure to keep the focus on only one-third of the entire product depth for the best result.
White Balance Setting

Let’s talk about one of the most effective camera settings, especially for the product photography project. The white balance function determines the white temperature on the image. This function determines if the photo will have a yellowish or a bluish touch all over it. You need to customize the white balance function of your camera to have the appropriate color scheme.
Most photographers use the auto white balance setting. Unfortunately, it makes us disappointed. You know that auto functions often make mistakes. Like how autofocus misses the main object many times. Yet, we recommend a custom white balance in this case. Of course, you should always check how the product looks when customizing the white balance.
Always remember that auto white balance can never guarantee the best quality white temperature for a particular environment. Undoubtedly, modern AI is trustable but not always when it is a serious matter like commercial photography. That’s why we suggest customizing the white balance according to your requirements.
Camera Mode Setting

Next, it is about another essential factor, the camera mode. Manual, Aperture Priority, and Automatic are the most offered camera modes by most of the cameras. Now, the question is which model performs the best for the product photography.
In general, we suggest using the manual mode for just a specific reason. For example, the aperture mode lets you only choose the level of the aperture. On the other hand, the automatic mode always sets the mode automatically. But, as usual, it can fail to select the appropriate model for a photo.
But the manual mode always asks you to choose the method. Thus, you will have the opportunity to select the appropriate way for the setting. Therefore, to avoid different unnecessary sub-optimal automatic functions, we always suggest using the manual mode.
File Type Setting
When you save an image, you must be asked to choose the file type for that. Generally, you will have two options, RAW and JPEG. Now, the question is which type will be the best option. Many professionals may suggest you select RAW as it is suitable for all kinds, including the clipping path.
We agree with them but not on specific cases. For example, the process of workflow with RAW is not very easy as that of JPEG. Eventually, if you are not familiar with the functions of RAW, you might end up making a mess. Also, RAW images require post-processing and many other additional parts. In that case, we suggest using JPEG for sure.
But you should also remember that RAW is always best if you are a pro. When your project is critical, and the color accuracy is much more essential to get its best form, RAW is the best option for you. Also, it is a must-try when the product color is complicated if there’s a mixture of dark and light colors.
File Size Setting
What size of the image you need should be determined before you capture it. Then, you can set the file size function correctly to get the image in the appropriate size. Generally, the camera sensor registers the image resolution more than it needs. Though the editor will crop and resize it while editing, the extra resolution can cause late loading.
The typical FullHD screen resolution of 1920x1080px is the most recommended camera image size. Even if you don’t need FullHD, you can crop it after capture as you like. It’s better to use so that you can get the same image with multiple resolutions and sizes.
Advanced Camera Settings
When you have no choice to work as a skilled professional, the advanced camera settings might help you seamlessly. Basically, these kinds of extended settings are not very easy to handle. You have to be extra careful while using them. Nevertheless, most professional photographers use these settings to click their masterpiece.
Live View Setting
Live view is an essential camera setting option that most professionals forget to customize. Eventually, most of them don’t even know much about it. However, it is a fundamental option, especially when capturing images in LED and constant light settings.
You can preview the image with the live view option before capturing it. Additionally, this function simplifies the whole process of capturing the photos. Eventually, with the help of the live preview option, the autofocus option works more accurately.
Generally, there are different sections in the live view function. Among them, two specific options are essential if you want to capture photos like a skilled one.
-
Exposure simulation
Exposure simulation is the most crucial function of the Live view setting. But it is only available on cameras from Sony, Canon, and a few from Nikon. When you are capturing images in constant lighting, you must keep the exposure saturation function on. If the light setting is normal, keep it disabled as before.
-
Depth of Field Simulation
Secondly, it is the depth of field simulation. This function uses a wide-open aperture to keep the depth of field shallower. It should be enabled, especially when you are capturing a shiny product like jewelry. It helps correct the aperture quickly and reduce noise.
Color Space

Generally, you can save a photo in your camera with two different color spaces- Adobe RGB and sRGB. You should save it with Adobe RGB when you need to print the image directly from the camera. But if you need to use them on the web for customization and editing, you definitely have to convert them to sRGB.
Lens and Camera Stabilization

Remember that product photography cannot go with stabilization, whether the lens or the camera. So you should always ensure enough stabilization by the tripod, or the camera stands. The lens and camera stabilization can destroy the image quality for sure.
In two cases, you have to check the image stabilization, especially for the product photography project. Firstly when the photo is taken in a very dark environment and secondly, when the shutter speed is deficient. It is also essential to check when the focal length is applied without a tripod. You can customize the stabilization function according to the background and light setup.
Diffraction Correction
Sometimes you will have images with improper sharpness still if you customize all the basic settings. It can be a cause of an enabled function named diffraction correction. This function causes losing the sharpness of the image and increases the level of aperture. Also, it increases noise that can rarely damage your image quality.
Most of the time, we suggest keeping this function on, meaning enable. The aperture it creates is essential in many cases. But if the sharpness level and the extra noise irritate you, you can disable this function for sure. You will find this function in the lens correction of the setting.
Chromatic Aberration Correction
It is essential to set when you capture an image in a dark setup, or the product color is dark, but the background is very light. Generally, chromatic aberration will appear when the focus point is highly darker compared to its background color. With strong chromatic aberration, the edge of the product will be highlighted automatically.
Because of having highlighted edges, the color of the entire product will be faded. But you can handle this issue with your camera settings. Just disable the chromatic aberration function on your camera. Then the edge of the dark product will be crisp and get the appropriate color.
These are the most effective camera settings you can use while capturing commercial product photos. You can handle it with the basic functions even if you are a beginner. But if you don’t have much more knowledge about it, it’s better not to make a mess by mistake. On the other hand, professionals can easily use the advanced settings for the best aftermath.
To Wrap Up
Now, we can anticipate that you have understood the functions we discussed and get enough idea why, how, and when you need to use them. Still, if you have any confusion left, knock us on the comment section. We love to hear from you about your opinion and confusion. Thank you for staying with us this long.